7 Common Boat Fiberglass Repairs Every Owner Should Know
- Sep 20, 2025
- 11 min read
Fiberglass has quietly taken over the boating world, offering a material that lasts up to 30 years with proper care. Wooden hulls rot, metal corrodes, and replacements get expensive fast. But most boat owners never realize that fiberglass boats now dominate the market because they resist saltwater, mold into any design, and actually weigh much less than their traditional cousins. The real surprise is how a few simple maintenance habits can make your fiberglass vessel outlast anything else on the water.
Table of Contents
Quick Summary
Takeaway | Explanation |
Fiberglass is durable and lightweight | Fiberglass outperforms traditional materials, offering better resistance to corrosion and enhancing fuel efficiency for boats. |
Regular hull inspections are essential | Conduct thorough inspections to identify hairline cracks or signs of stress, which can prevent costly repairs later. |
Address gel coat scratches promptly | Repair minor scratches quickly to prevent water intrusion that could lead to more serious structural damage. |
Choose the right resin for repairs | Use epoxy for structural integrity and polyester for cost-effective minor repairs, evaluating needs versus budget. |
Maintain repairs with regular care | Implement a maintenance routine post-repair, including inspections and protective measures, to prolong the life of your boat’s fiberglass. |
1: Understanding Fiberglass and Its Benefits
Fiberglass represents a revolutionary material that has transformed boat construction and repair. Unlike traditional wooden boats, fiberglass offers exceptional durability, lightweight performance, and remarkable resistance to marine environments. Modern boat owners increasingly rely on fiberglass for its superior qualities that make marine vessels more resilient and long lasting.
At its core, fiberglass is a composite material made from fine glass fibers woven together and reinforced with a polymer resin, typically polyester or epoxy. This unique construction provides several key advantages for marine applications:
Corrosion Resistance: Unlike metal, fiberglass does not rust or deteriorate in saltwater environments
Lightweight Structure: Enables better fuel efficiency and improved boat handling
Moldability: Can be shaped into complex designs and contours with precision
Understanding fiberglass composition is crucial for boat owners who want to perform effective repairs and maintenance. Explore our comprehensive guide on fiberglass repair techniques to gain deeper insights into managing your vessel’s structural integrity.
According to Marine and Safety Tasmania, professional inspection of fiberglass hulls is critical. Potential issues like delamination and stress fractures can compromise boat performance if left unaddressed. Boat owners should regularly check mounting points, joints, and areas experiencing significant structural stress.
The versatility of fiberglass makes it an ideal material for boat construction and repair. Its ability to withstand harsh marine conditions while maintaining structural strength sets it apart from traditional boatbuilding materials. Whether you are a recreational boater or a professional mariner, understanding fiberglass properties will help you make informed decisions about boat maintenance and repair.
2: Inspecting for Damage on Your Fiberglass Hull
Regular and thorough hull inspections are critical for maintaining your boat’s structural integrity and preventing minor damage from escalating into expensive repairs. Fiberglass hulls require systematic and careful examination to identify potential issues before they compromise your vessel’s performance and safety.
A comprehensive hull inspection involves several key elements that boat owners should carefully assess:
Surface Examination: Check for hairline cracks, discoloration, and signs of stress or impact damage
Structural Integrity: Evaluate core strength and look for areas of potential delamination or weakness
Water Intrusion Signs: Detect early indicators of moisture penetration that could lead to internal damage
Learn more about mobile boat maintenance techniques to complement your inspection routine and keep your vessel in top condition.
According to Marine and Safety Tasmania, professional surveyors recommend paying special attention to high-stress areas such as mounting points, transom regions, and joints where different structural components connect. These zones are most susceptible to developing stress fractures and potential structural compromises.
When conducting your inspection, use proper lighting and consider using a bright flashlight to illuminate potential problem areas. Start with a visual inspection and gently tap suspected weak spots with a plastic hammer. Soft or hollow sounds can indicate underlying delamination or structural damage that requires immediate professional assessment.
Boat owners should document their findings through photographs and detailed notes. Tracking changes over time helps identify emerging issues and provides valuable information for professional marine technicians. Regular inspections not only prevent costly repairs but also ensure your vessel remains safe and reliable during maritime adventures.
3: Simple Gel Coat Repairs for Minor Scratches
Gel coat scratches are inevitable in boat ownership, but understanding how to address these minor blemishes can preserve your vessel’s appearance and prevent further damage. These surface-level imperfections might seem cosmetic, but if left untreated, they can potentially lead to more significant structural issues.
Before beginning any gel coat repair, you will need some essential tools and materials:
Sandpaper (ranging from 220 to 600 grit)
Marine-grade gel coat repair kit
Protective gloves and safety glasses
Clean microfiber cloths
Check out our ultimate boat detailing checklist to complement your maintenance routine and keep your vessel looking pristine.
According to South Australian Department for Infrastructure and Transport, minor cracks and chips in gel coats should be promptly addressed to prevent water intrusion and potential structural compromise. The repair process involves several precise steps:
Start by cleaning the scratched area thoroughly with a marine-grade solvent to remove any dirt or contaminants. Gently sand the scratched region using progressively finer sandpaper, creating a smooth surface that will help the new gel coat adhere properly. Mix the gel coat repair compound precisely according to manufacturer instructions, ensuring color matching and consistent application.
Apply the gel coat in thin, even layers, allowing each layer to cure completely before adding the next. Use a plastic spreader to create a smooth, uniform surface. Once the repair is fully cured, sand the area gently to blend the repaired section with the surrounding surface, then polish to restore the original shine.
Remember that patience and precision are key in gel coat repairs. While minor scratches can be managed by boat owners, deeper or more extensive damage might require professional intervention to maintain your vessel’s structural integrity and aesthetic appeal.
4: Epoxy vs. Polyester Resin: Which to Use?
Understanding the differences between epoxy and polyester resins is crucial for boat owners performing fiberglass repairs. Each resin type offers unique properties that make them suitable for specific repair scenarios, and selecting the right one can significantly impact the longevity and effectiveness of your boat maintenance.
Key characteristics of these resins include:
Polyester Resin: Less expensive, faster curing, good for general repairs
Epoxy Resin: Superior strength, better water resistance, more expensive
Explore our detailed guide on mobile boat maintenance to understand more about selecting the right repair materials.
According to Defence Science and Technology Group research, epoxy resins can be significantly enhanced through advanced chemical modifications, improving their mechanical properties and durability.
Polyester resin works best for smaller, cosmetic repairs and is more budget-friendly. It cures quickly and is ideal for filling minor scratches or small structural gaps. However, it is less resistant to water and more prone to degradation over time.
Epoxy resin provides superior bonding strength and water resistance. It excels in structural repairs, especially in areas experiencing high stress or constant moisture exposure. While more expensive, epoxy creates a more durable repair that can extend the life of your boat’s fiberglass components.
When choosing between these resins, consider the specific repair location, expected stress levels, and your budget. Structural repairs near waterlines or high-impact areas typically demand the enhanced performance of epoxy, while cosmetic touch-ups might be more economically addressed with polyester resin.
Professional marine technicians recommend conducting a thorough assessment of the damage before selecting your repair material. Always ensure proper surface preparation, follow manufacturer guidelines, and use appropriate safety equipment during the repair process.
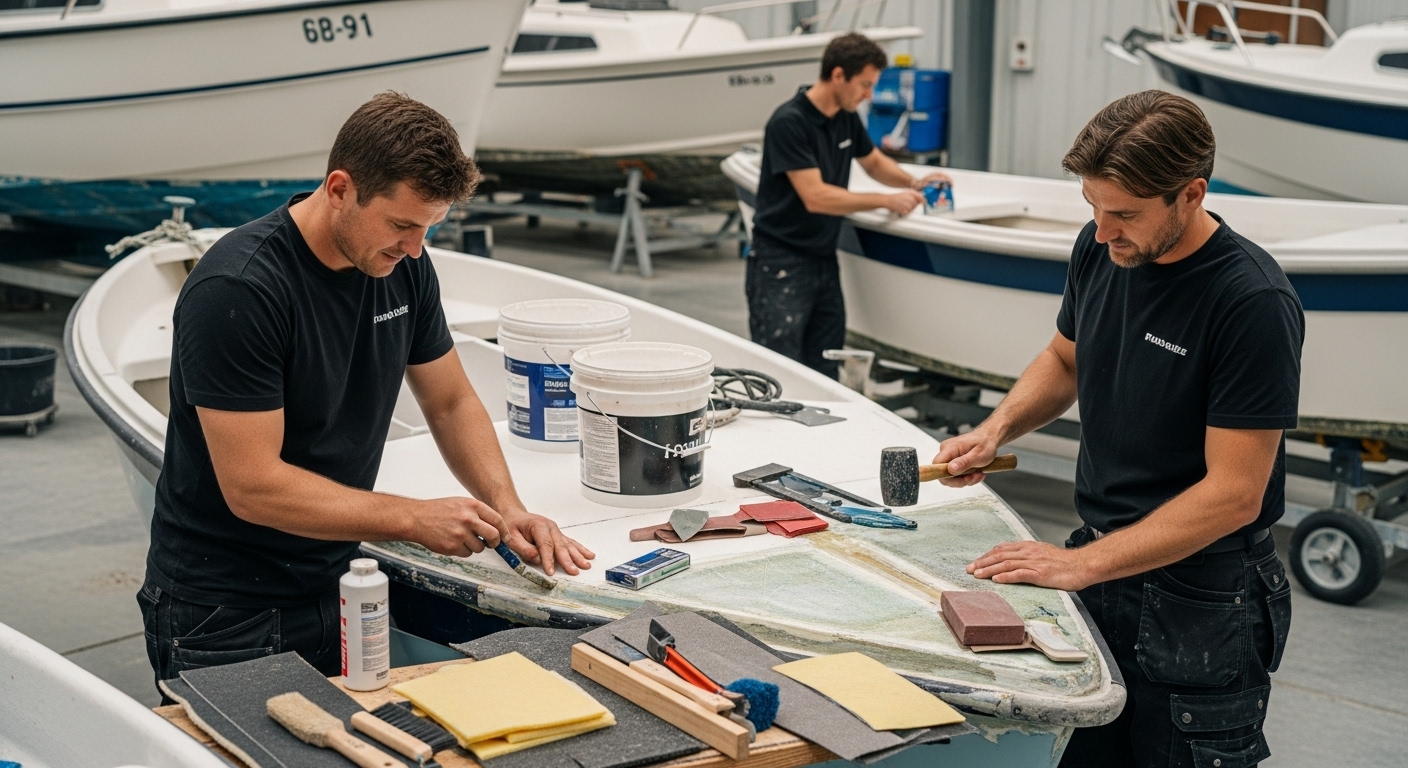
5: How to Repair Larger Holes in Fiberglass
Significant damage to your boat’s fiberglass hull requires careful and methodical repair techniques. Larger holes can compromise vessel structural integrity and demand a more comprehensive approach than simple gel coat touch-ups or minor scratch repairs.
Before beginning the repair, gather these essential materials:
Fiberglass repair kit with marine-grade resin
Fiberglass cloth or mat
Sandpaper (multiple grits)
Protective safety equipment
Clean work surface and workspace
Discover our comprehensive mobile boat maintenance guide to complement your repair skills and enhance your vessel maintenance knowledge.
The repair process requires precision and patience. Start by thoroughly cleaning the damaged area, removing any loose fibers or debris. Create a clean, smooth surface around the hole by carefully sanding the edges at a 45-degree angle, which helps create a stronger bonding surface for the repair materials.
Cut fiberglass cloth or mat slightly larger than the damaged area, ensuring multiple layers for maximum strength. Apply resin systematically, starting from the center and working outwards to eliminate air bubbles. Each layer should be carefully saturated and smoothed to prevent potential weak points.
Allow each layer to cure completely before adding the next, typically following manufacturer instructions for specific curing times. Once the repair is structurally complete, sand the area gradually using progressively finer sandpaper to create a smooth, seamless finish that blends with the surrounding hull surface.
While DIY repairs are possible, complex or extensive damage might require professional marine technician intervention. Large holes near critical structural points could indicate more significant underlying issues that need expert assessment to ensure your vessel’s safety and performance.
6: Reinforcing Weak Areas with Fiberglass Cloth
Proactive reinforcement of potential weak points is essential for maintaining your boat’s structural integrity and preventing catastrophic damage during maritime adventures. Fiberglass cloth provides an excellent solution for strengthening critical areas prone to stress and potential fractures.
Before beginning reinforcement, identify the most vulnerable areas:
Transom connections
Hull to deck joints
High stress mounting points
Areas experiencing repeated mechanical stress
Explore our comprehensive boat maintenance guide to enhance your understanding of vessel structural maintenance.
According to Marine and Safety Tasmania, stress fractures frequently develop in specific high-load areas such as where structural components intersect or experience concentrated pressure.
Preparation is crucial for successful fiberglass cloth reinforcement. Clean the target area thoroughly, removing any dirt, grease, or loose material. Sand the surface gently to create a slightly rough texture that will help the new fiberglass cloth adhere more effectively. Ensure the area is completely dry and free from contaminants before beginning the reinforcement process.
Select a marine-grade fiberglass cloth appropriate for your specific repair needs. Typically, a woven cloth provides superior strength and flexibility compared to chopped strand materials. Cut the cloth slightly larger than the area requiring reinforcement, allowing for proper overlap and complete coverage.
Apply a high-quality marine epoxy resin, carefully saturating the fiberglass cloth and eliminating any air bubbles during application. Use a plastic spreader to ensure even distribution and smooth out any potential wrinkles. Multiple thin layers often provide better structural reinforcement than a single thick application.
Professional tip: Allow each layer to cure completely before adding subsequent layers, and always follow manufacturer recommendations for resin mixing and curing times. Proper technique ensures maximum strength and longevity for your boat’s critical structural components.
7: Post-Repair Care and Maintenance Tips
Successful fiberglass repairs require more than just technical skill — they demand ongoing attention and strategic maintenance to preserve your boat’s structural integrity and aesthetic appeal. Once you have completed a repair, implementing a comprehensive care routine becomes critical to ensuring the longevity of your vessel.
Key maintenance considerations include:
Regular visual inspections
Consistent cleaning protocols
Protective waxing and sealing
Environmental protection strategies
Discover the comprehensive importance of boat maintenance to support your vessel’s long-term performance.
Monitoring repaired areas requires systematic observation. Check the repair site monthly for any signs of stress, discoloration, or emerging cracks. Use good lighting and run your hand gently over the repaired surface to detect subtle changes that might not be immediately visible.
Implement a thorough cleaning routine using marine-specific cleaning products that will not compromise the repair’s integrity. Avoid harsh chemicals that could potentially break down the resin or fiberglass. Rinse your boat thoroughly after saltwater exposure, paying special attention to repaired zones.
Protective measures are crucial for maintaining repair quality. Apply a high-quality marine wax or sealant specifically designed for fiberglass surfaces. This additional layer helps shield the repair from UV radiation, saltwater, and environmental contaminants that could potentially degrade the fiberglass over time.
Store your boat strategically when not in use. Indoor storage or using a high-quality, breathable cover can significantly reduce exposure to damaging environmental factors. If outdoor storage is unavoidable, invest in a marine-grade cover that provides comprehensive protection against sun, rain, and potential physical damage.
Remember that preventative maintenance is always more cost-effective than extensive repairs. Regular, systematic care will extend the life of your fiberglass repairs and maintain your boat’s structural and aesthetic quality for years to come.
Below is a comprehensive table summarizing the seven most common fiberglass boat repairs, key benefits, and essential steps for each, as described throughout the article.
Area/Repair Topic | Key Points & Benefits | Essential Steps/Recommendations |
1. Understanding Fiberglass & Its Benefits | Durable, lightweight, corrosion-resistant, and moldable | Know fiberglass structure; regular inspection for delamination |
2. Inspecting for Damage | Prevents costly repairs; ensures safety | Systematic checks for cracks, stress, and water intrusion |
3. Minor Gel Coat Scratch Repair | Maintains appearance; prevents water ingress | Clean, sand, apply gel coat in thin layers, sand/polish finish |
4. Epoxy vs. Polyester Resin | Epoxy: superior strength for structural; Polyester: affordable for minor | Assess area, match resin to repair need and location |
5. Repairing Larger Holes | Restores structure; prevents escalation of damage | Clean, sand edges, layer fiberglass cloth, saturate with resin |
6. Reinforcing Weak Areas | Reduces risk of future failures in high-stress points | Identify, prep, use marine cloth with proper epoxy application |
7. Post-Repair Care & Maintenance | Extends repair and vessel lifespan; protects investment | Inspect monthly, clean gently, wax, cover or store properly |
Transform Your Fiberglass Repairs with Professional Help
Tackling common fiberglass repairs can feel overwhelming, especially when hidden damage, persistent cracks, or tricky gel coat repairs threaten your boat’s safety and appearance. You spend time learning about delamination, resin choices, and hull inspections, but hands-on expertise is hard to match. If your day on the water is at risk or you need your vessel back in pristine shape quickly, trust the professionals who know how to spot and solve those deeper issues fast.

Let our mobile team bring specialized fiberglass solutions straight to your dock for a hassle-free experience. We offer custom repair, expert detailing, and reliable antifoul treatments that go beyond surface fixes. Learn more about our services at Lightning Boat Builders or take the next step by reviewing our detailed mobile boat maintenance guide. Your boat deserves repairs that last and results you can see, so reach out today for peace of mind on your next voyage.
Frequently Asked Questions
What are the signs of damage on a fiberglass hull?
Common signs of damage include hairline cracks, discoloration, and areas showing stress or impact damage. Regular inspections are essential to identify these issues early.
How do I perform a simple gel coat repair on my boat?
To repair minor scratches, clean the area with a marine-grade solvent, sand it smooth, apply a marine-grade gel coat repair compound in layers, and sand and polish once fully cured for a seamless finish.
What is the difference between epoxy and polyester resin for repairs?
Epoxy resin offers superior strength and water resistance, making it ideal for structural repairs, while polyester resin is less expensive and better suited for minor cosmetic fixes due to its quick curing time.
How can I reinforce weak areas on my fiberglass boat?
To reinforce weak areas, clean and sand the surface, apply marine-grade fiberglass cloth with epoxy resin, and ensure that you saturate the cloth completely to avoid air bubbles, allowing layers to cure between applications.
Recommended
Comments